


Accessing a CONNECT File Share is something that we all need to do from time to time, and some of us more often than others. This pages details the process for manually adding these drives on a non-CONNECT computer.
Please be aware If using a non-CONNECT Computer, which is not connected to the University Network, including working from home or via a wireless connection (including eduroam) you will need to use in coordination with the University VPN. If you need assistance or guidance for setting up the Cisco VPN, please visit this page: https://it.museums.ox.ac.uk/remote-access .
Please be advised that although this process will work on an IT Services Managed CONNECT Computer it should not be necessary, as those File Shares which you have access to should automatically be visible and accessible to you. If you ever lose access to the CONNECT File Share on a CONNECT Computer, please try rebooting the computer to restore access.
How to access network drives from work or personal computers.
Please take the following steps:
1. Open the Windows 10 search box and type This PC
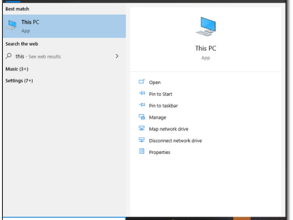
2. In the next window, select Map Network Drive as displayed

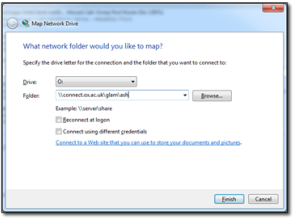
3. In the Drive field, select the drive letter O (O is the standard convention for the organisational file shares and should always be used if possible)
4. In the Folder field, enter the right path to your CONNECT File Server: \\connect.ox.ac.uk\glam\XXX
Each path consists of three letters:
| Path | Description |
|---|---|
| ASH | Ashmolean |
| MNH | Natural History Museum |
| PRM | Pitt Rivers Museum |
| MHS | History of Science Museum |
| OBG | Botanic Gardens & Arboretum |
- Reconnect at logon
- Connect using different credentials
Click on Finish, as shown on the image below.
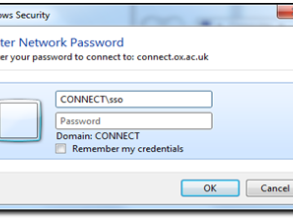
5. In the username box enter your CONNECT Single Sign-On (SSO), such as 'glam0001' prefixed by ‘CONNECT' as shown in the image below.
- Remember my credentials
6. In the Password box, type your CONNECT password and then click OK.
7. Your drive should now be mapped and accessible via Windows Explorer.
Please take the following steps:
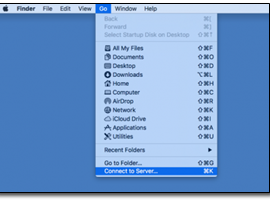
- Go to the Go menu
- Scroll down to Connect To (or press CMD+K)
3. Enter the right path to your CONNECT File Server: smb://connect.ox.ac.uk/glam/XXX
Each path consists of three letters:
| Path | Description |
|---|---|
| ASH | Ashmolean |
| MNH | Natural History Museum |
| PRM | Pitt Rivers Museum |
| MHS | History of Science Museum |
| OBG | Botanic Gardens & Arboretum |
4. Click on the plus sign (+) to add it to the list below

5. Click on Connect
6. Please enter your CONNECT credentials (username & password)
7. The Connect server, and subsequent shares beneath, will now appear in the Finder side bar under Shared, down the left hand side.
If you'll need regular access to the CONNECT File Share on your Apple Computer then you will need to add it as a Startup item.
The process for doing this is described below:
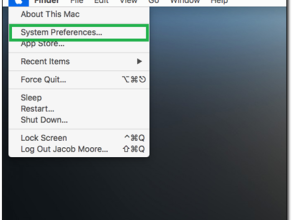
1. Click the Apple logo from the top-left corner and select System Preferences
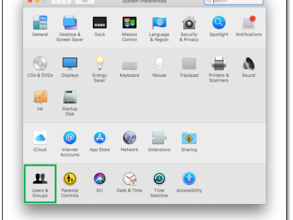
2. Within System Preferences click on Users & Groups
3. From here you can add or remove new users or groups, change password for the users, change users' profile picture, etc.
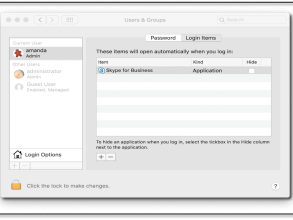
4. Select your name from the left pane and click the Login Items tab in the right pane
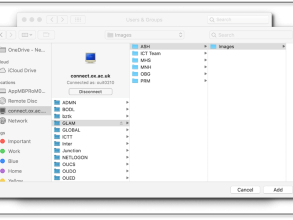
5. Click on the plus sign (+) from the lower section of the right pane, locate and select a share from the next window and then click on Add. Here you can add any other shares, folders or applications in the same way.
6. Finally, close System Preferences, and after restarting the computer, the CONNECT File Share will automatically be mapped for you each time you log in.